TP-Link Tapo Smart “no neutral” Light Switch Reviewed
My 1950s house is imbued with the kind of character that only results from renovations performed on a shoestring budget. Our living room has two switches. It has two lights. One switch operates each light. They are not connected in any way. The switches are on opposite sides of the room. The room is quite large and often really does need both lights to be properly lit. This is intensely irritating. This is also extremely expensive to fix.
When we moved in we had a significant amount of electrical work done over multiple days to add/move sockets, replace light fixtures, replace fascias and route a particularly ugly EV charging conduit through the living room ceiling. The latter took the lion’s share of the time- an awkward fare of drilling through ceiling joists and snaking cables that gave us a glimpse at just how painful fixing our lighting might be.
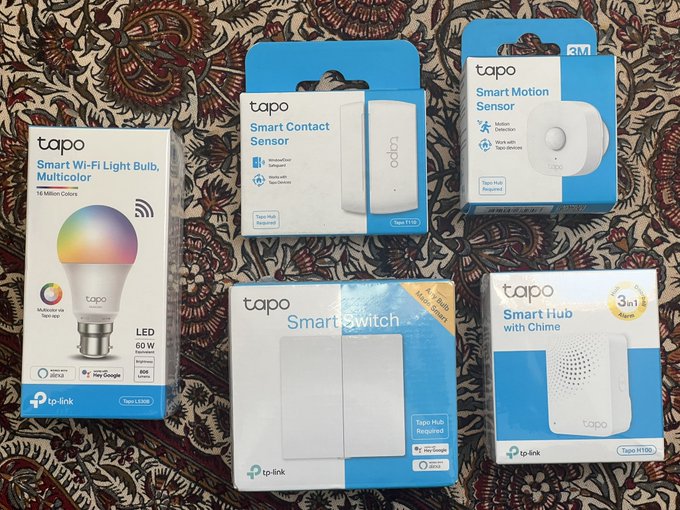
Could this assortment of smart toys from @TPLINKUK be the solution to my ridiculous living room light switch problem?
I’ve just ordered a pair of their white B22 bulbs so I can find out! pic.twitter.com/vFcoyKKT2x
— Phil Howard (@Gadgetoid) October 31, 2022
A proper fix, therefore, was ruled out. Enter TP-Link’s Tapo light switches. Each is a 1-gang unit with either one or two physical switches, and they’re defensively designed with triple-A batteries for power in order to circumvent the lack of neutral wiring in old houses like ours.
But, wait, what’s Tapo?
TP-Link’s Kasa and Tapo smart home ecosystems exist side-by-side in a slightly confusing, two-pronged attack on the smart market. They consist of different product offerings powered by different apps, but work in broadly similar ways. Some of my favourite Kasa products – the KL430 LEDs- have disappeared out of production. Whether they will eventually be compatible, or Kasa will fade into obscurity, remains unclear, but TP-Link have at least mentioned that an update to bridge the two is in the works.
TP-Link’s Tapo switches require a Tapo hub in order to function. The hub is a little wall-wart that plugs discreetly into a socket and provides the low-power wireless interface that the switches need to operate efficiently. It also includes a chime that can be triggered by smart actions. This is a pretty handy value-add that I’ll be talking about in another article. The hub bridges your existing wireless network to some (but not all) Tapo devices and, for the most part, is seamless.
TP-Link were kind enough to supply a few bits and bobs for me to write about; including a smart bulb, hub, switch, PIR sensor and door sensor. I purchased a second smart switch from Amazon so I could do both of the living room lights.
The Switch
The switches themselves are relatively uninspiring. Plain white, full-height momentary push-button switches that actuate a little push-button beneath them. This means they don’t feel particularly satisfying to “switch” but they’re at least easy to bump on and off if you have both hands full.
The light circuit is switched internally by a relay that sits normally-open and requires the battery power to hold it closed. A little slide switch on the bottom of each switch over allows you to unlock the front part and pull it off. This plastic cover- housing the switches and not much else- reveals the AAA battery compartment beneath so you can easily change the batteries while the switches are still in the wall.
Perhaps the coolest thing about these double switches is that, even if you don’t connect a real circuit up to each of the terminals, the switch itself still fires a usable event that you can use in home automation. That means I could wire one of the switches to my real lights in each case, and leave the other one unconnected so that it could switch the other light remotely.
Most of the meat of the switch is in a fairly large bulge around back. This sits inside your wall box (or pattress as I’ve come to understand), and requires at least a 25mm depth box (although I went with 35mm to give me room to work).
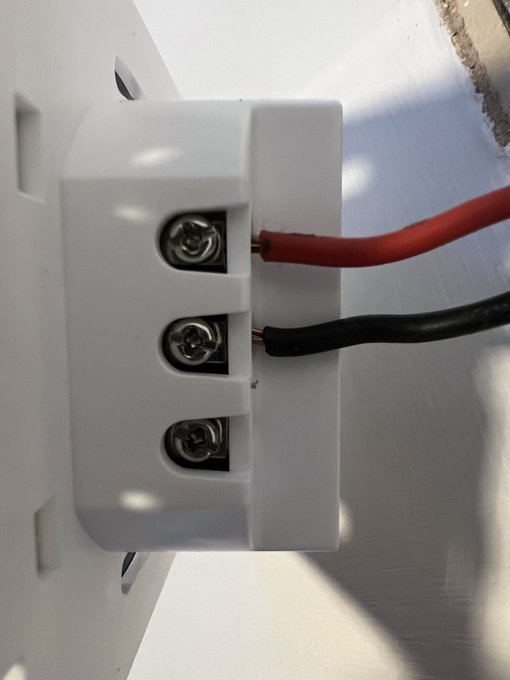
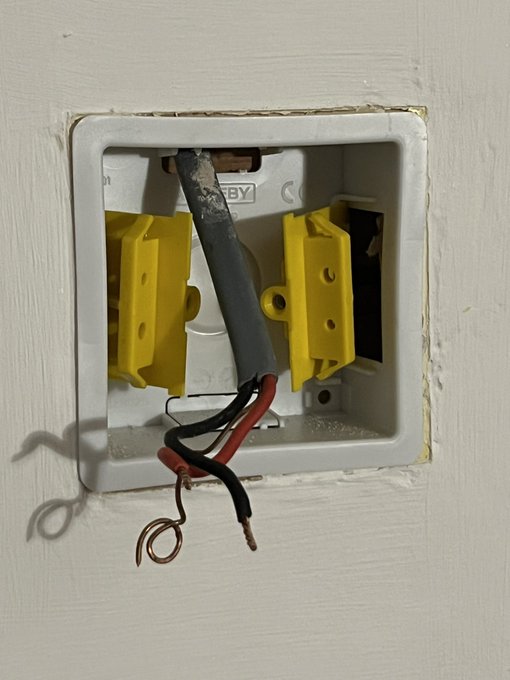
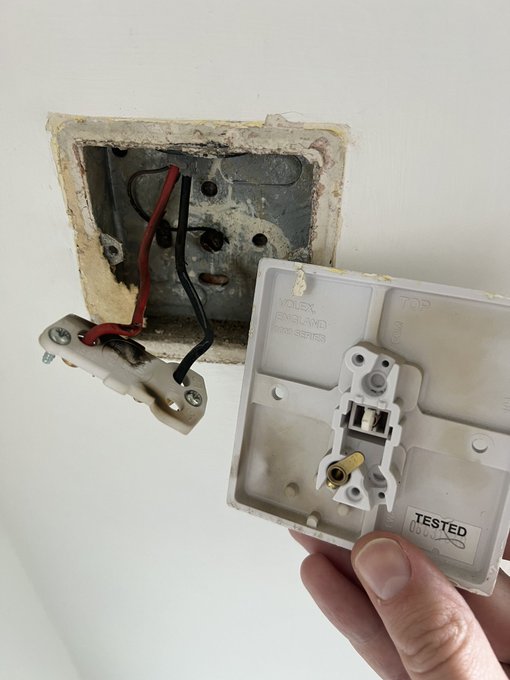
New switch going on- it’s battery powered so the lack of neutral is irrelevant.
Not sure if a little bare wire should peek out or if the flex should be butt up against the terminal ? pic.twitter.com/CYL7KjkQXN
— Phil Howard (@Gadgetoid) November 1, 2022
Fitting The Switches
Before you even consider swapping your regular switches with smart switches you should shut off the relevant breaker and inspect your existing boxes.
If you’ve got plastic boxes mounted into drywall, great! These are incredibly easy to replace, using a simple slot in mechanism that clamps tight when the faceplate is screwed on. You can find these on Screwfix called something like 1-gang dry lining knockout box.
Extremely based pic.twitter.com/BD4MW6kYE6
— Phil Howard (@Gadgetoid) November 2, 2022
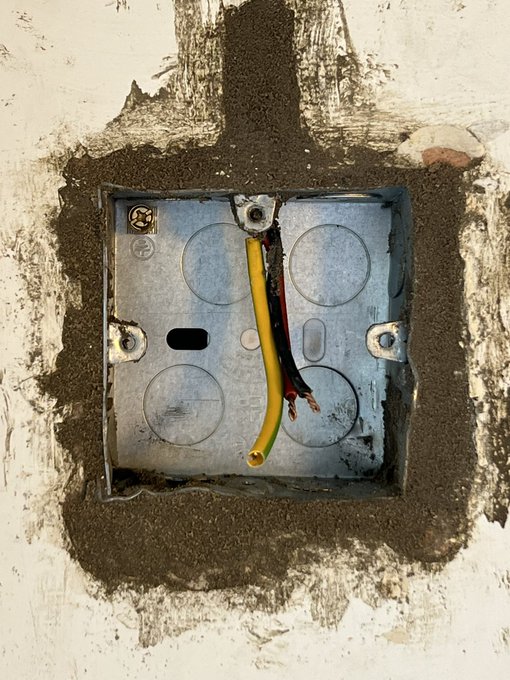
If you’ve got galvanised steel boxes set into the plaster over your brick walls… you might have trouble. If- like mine- yours are a mere 16mm deep then you will need to remove the box and hack a deeper hole into your wall in order to set a 35mm box. This is extremely tricky and, having successfully done it myself, I would recommend either using a surface box or spacer, or paying someone with the tools, expertise and practise to embiggen your wall holes. Trust me, it’s a DIY nightmare, makes an astonishing amount of mess and will take days and multiple passes with various filling compounds and paint layers to “make good”.
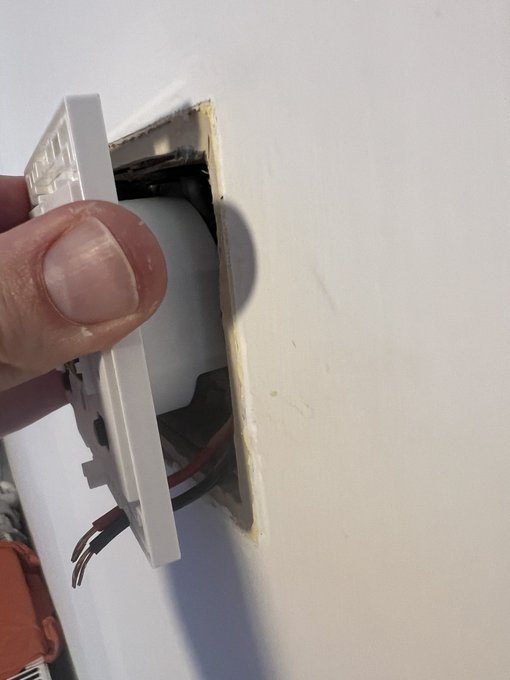
Well damn. I need an extra deep wall box. ? pic.twitter.com/VOoS8a90Mr
— Phil Howard (@Gadgetoid) November 1, 2022
In my case I – almost- had one of each. At the front of the living room was a 16mm steel box screwed onto a bit of scrap wood mounted to a stud inside the drywall. Clearly built either by someone who didn’t know or didn’t care that the plastic boxes existed, or perhaps before they existed.

This is absolutely peak cursed pic.twitter.com/aatAEmow3p
— Phil Howard (@Gadgetoid) November 1, 2022
At the back of the living room was a very awkwardly placed 16mm steel box in a tight corner. Behind it was a mix of mortar, cinderblock and very stubborn brick.
In both cases my boxes needed to be replaced. In the case of the plasterboard wall I unscrewed the old box, pushed the flimsy scrap wood back into the wall, shoved the plastic box in the hole and engaged the little plastic clips to lock it into place. This took minutes. I stripped back the old, tarnished wires – since there was plenty of slack – re-twisted the ends, and added some yellow and green earth sleeve over the unprotected earth wire. If you’re at all comfortable with electrics and have a wire stripper – or something that can be safely abused to serve as one – then fitting into new plasterboard wall boxes should be a breeze.
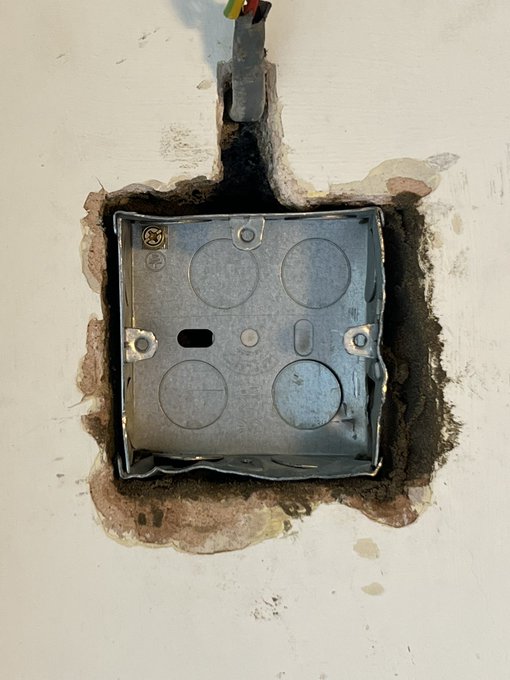
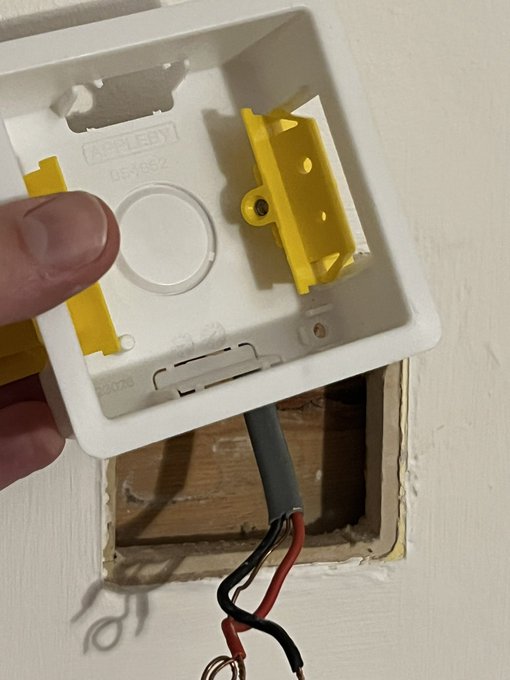
Used a hand chisel to widen the hole and slip the pattress box in. Decided to re-use the one I had after bending it … mostly back into shape! pic.twitter.com/ItLzia8MnB
— Phil Howard (@Gadgetoid) November 4, 2022
On the brick and mortar wall I decided to install a spacer or surface pattress. Then I thought “I want it to look nice, even though it’s hidden in the corner.” I regret this thought, for it spawned a multi-day adventure of chipping away at my wall with no less than three different tools in order to gouge a hole large enough to accommodate the 35mm box. In fact cutting an accurately sized hole is difficult to impossible, so I ended up overshooting and using ready-mix cement to size down as best I could. At time of writing the socket is still surrounded with a mess of unfinished cement that I’ll need to sand, fill, prime and paint to blend with the walls. The switch is in, however, which for the purposes of this review is the important bit.
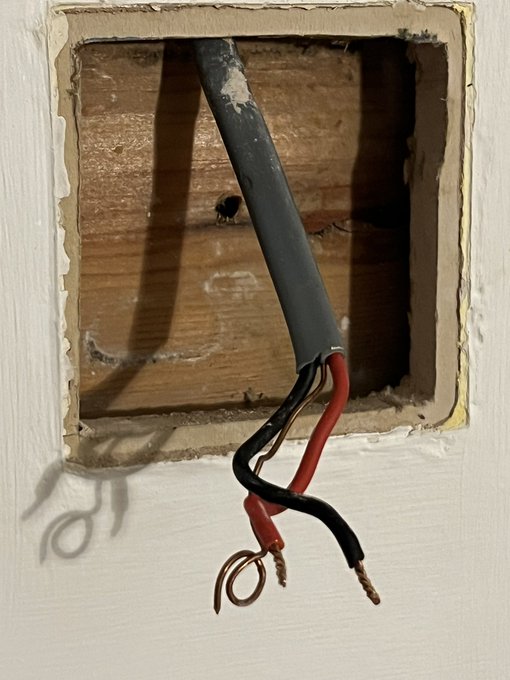
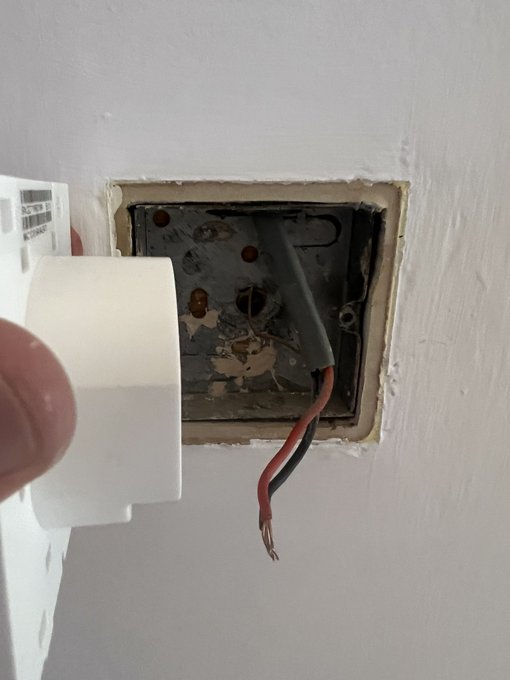
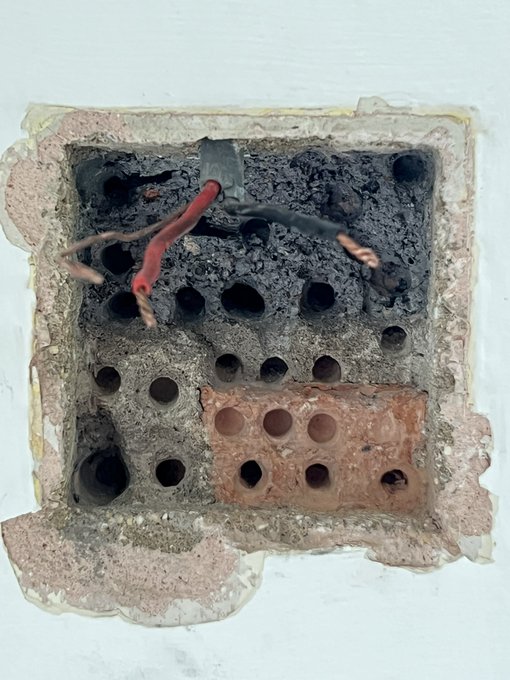
In the case of my brick and mortar switch the cable was mortared into the wall. To add insult to injury the live wire had also been pressed against the bare neutral screw at the back of the box, damaging its sheath and causing a rather nasty short. The switch was blackened when I removed it from the wall. I guess I’m glad to have found and fixed this.
Little wall-mounted smoke machine… pic.twitter.com/K6DG7xx6I2
— Phil Howard (@Gadgetoid) November 1, 2022
Since I had to trim the damaged wire, and had absolutely no slack to play with, I decided to use a couple of Wago connectors (swept up and saved from the trash after the Electrician had been) and some spare wire (I’m not even going to tell you where that came from) to extend the circuit down to reach the smart switch terminals.
Overall the job took a couple of days, and this was just for two switches in one room. If you’re planning to smarten up your home I must reiterate- do a quick survey of what you’ll be up against before you order any kit! Pay attention to whether or not you have a neutral wire, too, since if you do you’ll likely want to avoid having to maintain batteries in your light switches.
The cinder block just melts but that cursed brick in the corner is hard as nails! pic.twitter.com/w0opYUj31r
— Phil Howard (@Gadgetoid) November 2, 2022
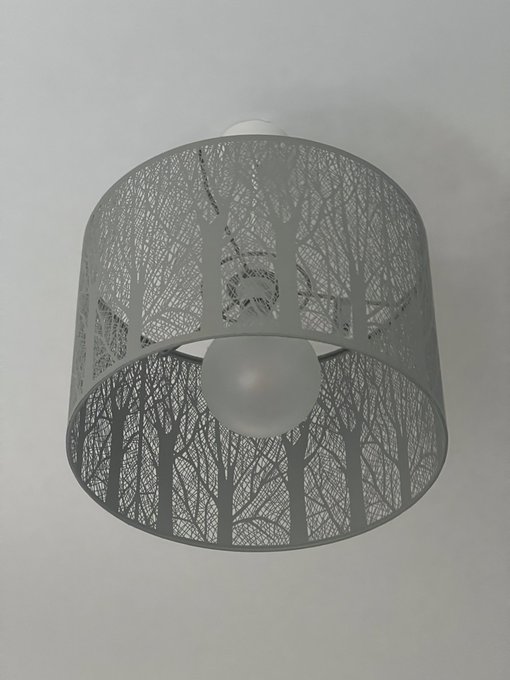
Right about this point I’ll be honest- when TP-Link said “switch” I expected a standalone box I’d just stick to my wall with 3M tape that used a coin-cell or something to provide a single momentary switch I could use for some smart bulbs. This product exists, but the switches I installed were not it. In my particular case this turned out for the better, since I went out of my way to find particular large lamp shades and large, frosted globe bulbs that don’t have a smart counterpart. Smaller smart bulbs would both look odd, and require the normal wall switches to either be plastered with warning signs saying “Don’t turn this off” or replaced with blank plates behind which the lighting circuit would be shorted to always-on (is that such a great idea in a 1950s house that had smoking shorts hidden away? I Don’t know.)
Additionally TP-Link’s smart bulbs use WiFi and thus draw a non-trivial amount of standby current in order to be ready to respond to events. Our beautiful big dumb bulbs don’t use any power when off, and neither – on a technicality- do the smart switches, which rely on the AAA batteries and not mains.
So, what was the result?
I’m… not really into smart home stuff. At least not for the sake of it. I’ve always used it since it’s made for a great alternative to DIY and major electrical wiring upheaval. Our under-cabinet kitchen lights ended up being two strings of TP-Link’s Kasa KL430 since they just stick on and run from a plug socket. If I’m going to install something smart, it better be for a good reason. This was a good reason.
After setting up and installing the switches I could use the Tapo app to cause each spare switch to trigger its counterpart at the opposite end of the room. Since the switches are momentary push buttons there’s no on/off state to keep track of so a tap of either switch will always toggle the light.
It doesn’t have to be this way, however, and you can – for example – have one switch toggle both lights, or have one switch for on and one switch for off, or have the spare switch control a smart plug, bulb or virtually any other product from the Tapo range.
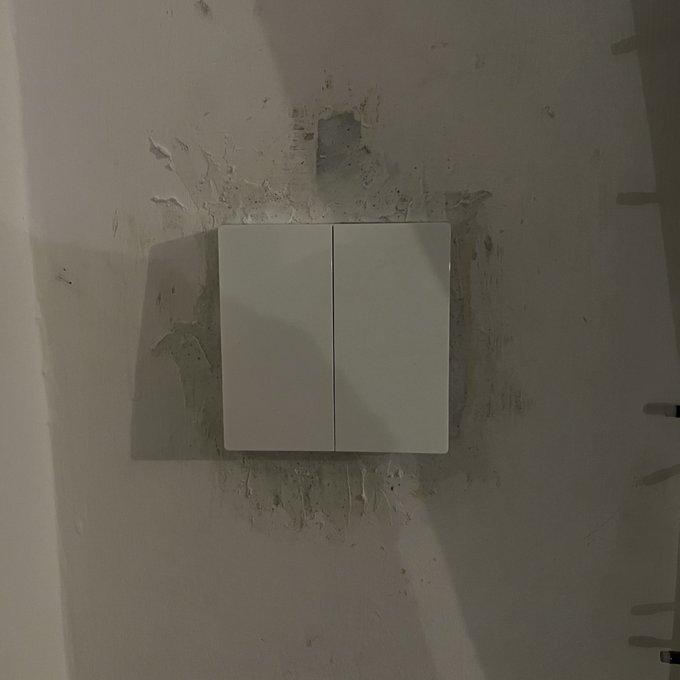
On the upside this one now just needs sanding, primed and painted and you won’t know the pain I suffered to get that 35mm pattress installed ? pic.twitter.com/VLTFiJSI6H
— Phil Howard (@Gadgetoid) November 7, 2022
Despite the literal blood and sweat that went into installing these switches and my initial confusion about what, exactly, I’d be setting up, they did exactly what I’d hoped- allowed us to switch both living room lights from the doorway without traversing the room to flip the other switch. While this solution is incredibly overengineered and requires keeping two sets of AAA batteries in check (I’ll try and replace them with rechargeable ones once those supplied run out) it’s a great deal cheaper and less invasive than the alternative- fixing our crappy old wiring.
An alternative to this rather tricky solution – let’s face it, installing new wall boxes is not everyone’s cup of tea – is to use smart bulbs and leave your light switches always-on. I set up a single TP-Link smart bulb and sensor that I’ll be covering in another article. I find it turned off at the wall on a regular basis, rendering it useless. Just this evening I had to re-pair it to WiFi since it had been toggled on/off enough to simply reset it altogether. As difficult as replacing the switches in your wall might be (remember, if you’re fitting into drywall or comfortable with a bulbous surface box you’ll be mostly fine) it solves the problem of people idly turning your smart bulbs off. This approach also lets you take your pick of bulbs, control multiple bulbs with a single switch, and provides – by default – a switch interface that’s utterly familiar and intuitive to guests so they won’t mess up your smart lighting.
The hub-connected switches also have the benefit of not overloading your WiFi access point with devices. One hub, one WiFi connection, multiple switches. Since they are powered by AAA batteries they also have a much lower quiescent power consumption than continuously WiFi-connected lightbulbs. Whether this actually translates into any energy costs savings- charging or purchasing batteries still costs money- remains to be seen. A single switch controlling multiple, dumb bulbs seems intuitively like it would be more power-efficient and would at least appear as such on your Smart Meter.
The downside of these smart switches is the cost. The hub – roughly £30 – is a prerequisite. Each single switch costs £20, and double switches cost £30 (although I purchased my additional one for just £20). This brings the total cost of my setup- minus installation costs and materials – to £70. My fancy but dumb LED frosted globe bulbs were about £28 shipped for four from a specialist supplier (I ordered some from Amazon first and they were garbage). Compare this to smart bulbs and you might be forgiven for being hesitant- a four pack of TP-Link’s Tapo bulbs currently costs £24. No hub is required. They’ll use your existing WiFi. You’ll have to vigorously defend your light switches from assailants or short them to always-on behind a blanking plate. It’s a balance.
In summary – if you want to smart up your lighting without paying for a handful of bulbs to remain constantly connected to your WiFi. Don’t want to obsess over your light switches. And you want to pick your own, stylish filament bulbs or vintage style bulbs- then smart switches, instead of smart bulbs, is absolutely the way to go.
If you don’t care what your bulbs look like, don’t mind taping little “Don’t Turn Off” labels over your switches. Don’t mind the idle power draw. And, and this is a really important one, you don’t have kids- they will figure out how to reset your bulbs by accident or on purpose just to wind you up – then… actually maybe just stick to regular bulbs.
Okay I have cancelled my bulb order because we really like our giant frosted globe bulbs. Instead I’ve ordered another switch for the far end of the room. Rest of the gear has been kindly supplied by @TPLINKUK so I’m only out £20 for the whole shebang. pic.twitter.com/FNSqdPYR3G
— Phil Howard (@Gadgetoid) October 31, 2022
Me? I’m happy with the smart switches. They do exactly what I want without me having to remain constantly vigilant about keeping the physical switches in the “on” position- bear in mind I’ve had a single smart bulb set up for only a few days and I’ve already had to reconfigure it once. They work as individual switches whether the Hub or my WiFi network is stable or working. I haven’t had my setup long enough to know how big a hassle the AAA batteries will be, but as winter draws in and it gets darker and gloomier it’ll no doubt be a godsend to switch on both lights without a trek to the far corner of the room. Oh and if your toddler is fascinated with electronics- maybe tuck the bulb’s hub somewhere out of reach. It takes a little while to come back online once turned off.
I had a problem. TP-Link’s Tapo switches and hub solved that problem. I haven’t even configured our voice assistants to switch the living room lights yet.