YubiKey 5Ci Reviewed (iOS 13.5, Raspberry Pi, WSL)
The YubuKey has been on my radar for a while now, but it’s not until the iPhone-compatible 5Ci that I’ve thought “now’s the time” and made a concerted effort to reach out to them. Yubico were quick on the draw and shipped me a 5Ci to try out. My goal? Find out how many services and devices I could use this digital key to unlock, and whether the process streamlines, or hinders, my daily authentication overhead.
First, for those of you who don’t know anything about me, I should establish that I’m a developer. Specifically I write and maintain a number of Python drivers and other projects chiefly relating to the Raspberry Pi and usually aimed at making it possible to integrate sensors, buttons, dials, screens and more with the platform. This work requires a certain level of trust, and a whole host of services against which I must authenticate. Chief among them is GitHub where authentication ranges anywhere from simply logging into the web front-end, to pushing new code up to the service from the command-line, to signing that code to prove (assuming the security of my private key) that I – a theoretically trusted person – authored it. That’s three different authentication facets for one service alone, so you can start to see how complicated my digital life can be. Balancing security with convenience is difficult, and when I’m duty-bound to err on the side of security… well I end up with very little convenience and lots of time spent juggling auth.
First Impressions
The 5Ci is YubiKey’s latest hotness, joining the 5-series which were announced in 2018. While the 5Ci was launched in August 2019 – almost a full year ago now – it wasn’t until iOS 13.3 (launched in December) that support for FIDO2-compliant security keys found support in iOS Safari. Thus many older reviews mention this support as missing- it’s not.
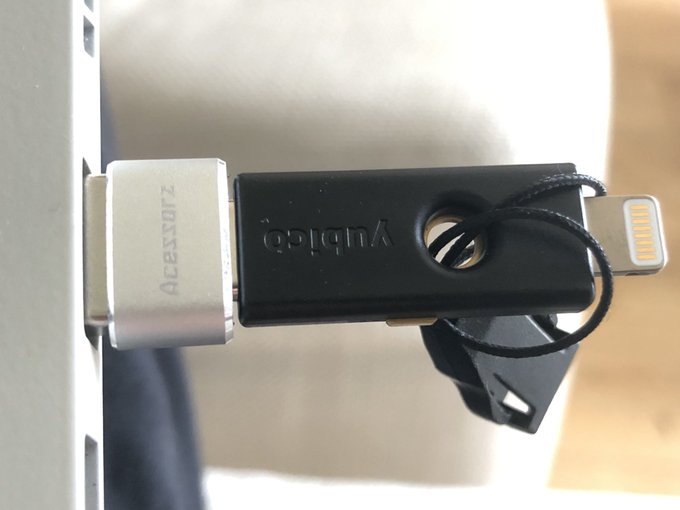
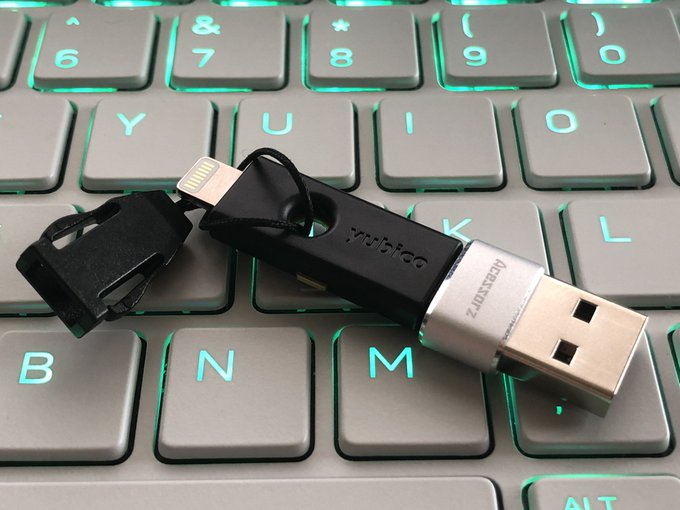
I don’t know what I expected, really, but the YubiKey 5Ci was extremely modestly packaged, much like you’d expect from an SD card. It’s a tiny, uncomplicated and utilitarian thing and feels surprisingly sturdy- that is, I tried to bend it as hard as I dared and there was no flex. I’ve also sat on it- I tend to loop my keys onto my belt and tuck them into a back pocket- a couple of times with no ill effect… yet. The hole in the middle is designed to accomodate a keyring while still allowing the YubiKey to be clipped around to use either the USB Type-C or Lightning connectors. I used a lanyard clip which was easily looped through and allows me to disconnet the key from my keyring. This may be a bad idea since the compact, unassuming form-factor may also be the YubiKey’s biggest weakness- if it’s not secured to something larger, it’s no doubt easy to misplace.
No cover, case or clip is supplied with the YubiKey- ideally you shouldn’t need one and should just add it to your existing keyring secure in the knowledge that it can take at least somewhat of a beating. I mean… when’s the last time you really worried about the connectors on cables you shove into your bag or a box?
Yubico’s Authenticator app on the iPhone works well, providing a second factor that requires the physical presence of the key in order to reveal any authentication codes. This is compelling since with my current authenticator setup, anyone who posesses (and can unlock) my phone has access both to a device connected to the internet, and second factors for all of my protected accounts.
The OTP (One-time Password) feature works pretty much anywhere, but – as you’ll read below – should ideally be configured to a long press. I could use OTPs from my phone to auth against a Raspberry Pi configured with the YubiKey PAM module and I’ll go into detail about how you can accomplish that too.
The Secret Key is simply glorious, and where websites trust it as a substitute for a password (when confirming identity in an already logged in session) it’s extremely convenient. I’m almost compelled to want a fingerprint reader or similar built into my laptop. Almost.
Initial Setup
Fresh out of the box the YubiKey 5Ci had an annoying habit of spamming OTP codes into my focussed windows at the slightest touch. Forunately this is just the default behaviour for a short touch, and can be tweaked using YubiKey Manager. Just insert your key, fire up the manager, hit Applications then OTP and press the little “swap” button between Slot 1 and Slot 2. Boom- OTP will now be a Long Touch which wont get triggered so easily.
USB Type-C
Setting up the YubiKey with a new signature for code-signing requires a separate piece of software, however, in the form of GNU GPG. Acquiring the Windows version of this software takes you away from the comfort of the Yubico website and over to the distinctly 2000s Gpg4Win website. You’ve be forgiven for thinking you had just stepped into some elaborate phishing scheme but, in fact, this is the software you want. Once installed Gpg4win gives you access to “gpg.exe” which can be used for signing on the command-line, and Kleopatra which is a graphical certificate manager, UI for encrypting/decrypting and- all importantly- a tool for managing smartcards. It’s in the Tools -> Manage Smartcards section of Kleopatra where you will generate the Signature, Encryption and Authentication keys to be stored on your YubiKey. Here you can also set your “Cardholder” name and “Pubkey URL”.
“Pubkey URL” is a vital field, since this is the URL that’s used to fetch your public key and facilicates an import of keys from your “smart card” (your YubiKey) into GPG on other computers. In order to obtain this URL you must upload the .asc exported from Kleopatra to a key distribution server. In my case I found that using Right Click -> Publish on Server on my certificate in Kleopatra’s main view either had no effect, or publishes somewhere that I can’t easily locate the URL for, so I did the following:
1. Exported my public key .asc file from Kelopatra, this is what’s exported when you hit Export in the main window of Kleopatra with a key selected.
2. Navigated to https://keys.openpgp.org/ and hit the “upload” link. Or just go direct: https://keys.openpgp.org/upload
3. Selected my .asc file and hit upload
4. Supplied my email address (the one associated with the key)
5. Verified my email address and grabbed the key URL, mine was: https://keys.openpgp.org/vks/v1/by-fingerprint/2C98CF69AF2827DAD3B77739FAA7D375332156B1
6. Set this as the Pubkey URL
You should also make absolutely sure that you double-click your new key in the main window of Kleopatra and hit the “Generate recovation certificate” button. This will prompt you to save out a .rev file which you should backup somewhere in case your YubiKey is lost. A revocation certificate is a way to say “this key is no longer trustworthy” since a lost YubiKey potentially places your identity in the hands of a malicious actor. Of course you might have a strong pin on your key, but security is best served in layers.
Using on computers without a USB Type-C port
While I love the forward-thinking, clean and tidy, USB Type-C nature of the 5Ci I am somewhat hamstrung by the unfortunate fact that my only USB Type-C port – on my Alienware m15 R2 – is right square in the middle of the back of my laptop. This is, as you might expect, an awkward place to reach when authenticating so one of the first things I looked into was an adaptor that would convert a USB Type-A connector to a USB Type-C socket. Amazon is rife with these, so I picked the best balance between low cost, number of reviews and quantity (they’re all shipped in bunches of 2 or 3 for some reason) and pulled the trigger.
So this works- as expected- but I’m pretty sure it’s some sort of sacrilege and the Gods won’t look upon this fondly come judgement day.
Note to reader: my only USB Type C support is awkwardly located in the back of my laptop ?
Sorrynotsorry @Yubico pic.twitter.com/XUpheEMNKH— Phil Howard (@Gadgetoid) July 4, 2020
Long story short, it works. Why wouldn’t it? The YubiKey doesn’t use any fancy features from USB Type-C so it’s effectively just using plain ol’ vanilla USB which a passive adapter should be more than capable of passing.
Code-signing on the Raspberry Pi
Additionally I really wanted to use the 5Ci with some of my Raspberry Pi systems. This is because I usually do my builds and deployment right from a Pi, and an awful lot of my programming leading to git commits and pushes from a Pi too. Having the YubiKey hooked up to the Pi would allow me to sign commits, packages and releases with ease.
Whaddya know? That works too!
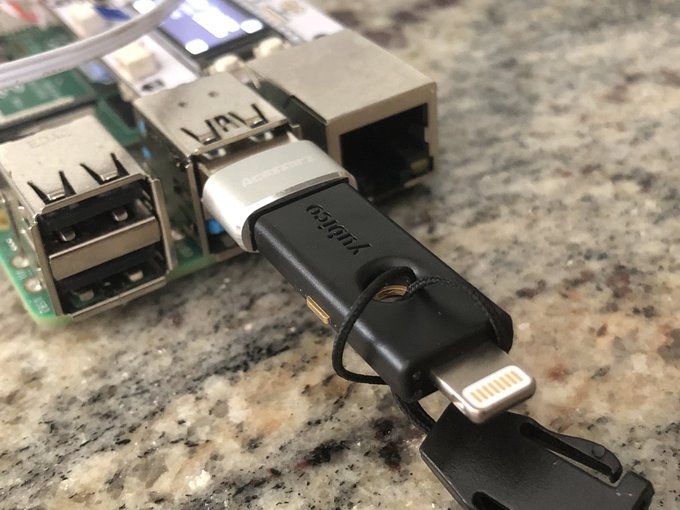

And yes this contrived setup allows you to use a @Yubico 5Ci directly on a @Raspberry_Pi … though this protrusion of adapter and key is even more unsettling than the sticky out SD cards I keep breaking off. pic.twitter.com/SE4PAxjxHp
— Phil Howard (@Gadgetoid) July 4, 2020
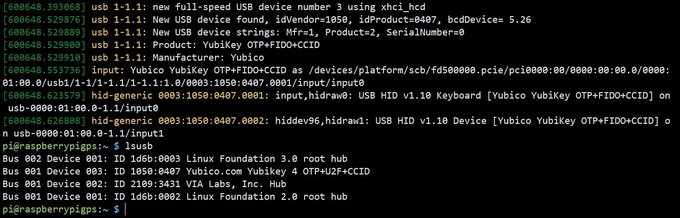
In order to get `gpg –card-status` to work I needed to `sudo apt install scdaemon yubikey-manager`. On one setup I needed to use YubiKey Manager to enable the USB interface since `gpg –card-edit` from a non-root user would fail with: `gpg: selecting openpgp failed: No such device`
“`
pi@raspberrypi:~/ $ ykman config usb –enable-all
Enable OTP, FIDO U2F, OpenPGP, PIV, OATH, FIDO2.
Configure USB interface? [y/N]: y
“`
Note: If your distro doesn’t have a YubiKey Manager package then you’re in for a ride installing it from PyPi or, if you’re lucky enough to be running Ubuntu, the Yubico PPA:
“`
sudo apt-add-repository ppa:yubico/stable
sudo apt update
sudo apt install yubikey-manager
“`
Once set up your keys need fetching with `gpg –card-edit` followed by `fetch` and `quit`. This uses the “URL of public key” property saved to the YubiKey in order to fetch the public keys, so ensure you’ve set this up correctly.
Before continuing you also need to indicate that you trust your own key. Since you are you and this is your key, then naturally you have complete and total trust in it. You should configure your key for ultimate trust:
“`
gpg –edit-key 2C98CF69AF2827DAD3B77739FAA7D375332156B1
trust
“`
You will be prompted to specify how much you trust the key, pick `5 = I trust ultimately` and Y to confirm.
Additionally in order to actually *sign* git commits with gpg I needed to run `export GPG_TTY=$(tty)` in my terminal. Without this I was faced with a cryptic error – “gpg: signing failed: Inappropriate ioctl for device” – when trying to `–clearsign` and git would fail with no useful output at all.
This can be added to `~/.bashrc` like so:
“`
GPG_TTY=$(tty)
export GPG_TTY
“`
To sign a commit don’t forget to `git config user.signingkey YourKeyGoesHere`, you can configure this globally for git with the `–global` option like you would your email and name.
I ran into issues getting the YubiKey working with my older Linux Mint laptop (A decidedly retro VAOI P11Z) and ended up having to abort my attempt when I ran into an un-googleable stone wall.
In order to get key signing to work on Windows I switch from WSL to cmd.exe and run `git commit –amend -S` to sign my commit before switching back to WSL and pushing. This process is suboptimal, but other solutions to expose YubiKey functionality in WSL are excruciatingly contrived. If you lean heavily on WSL for your coding workflow, you might find this to be a show-stopper.
Authenticating with YubiKey SSH on a Raspberry Pi
YubiKey’s OTP – one-time password – feature is a great way to log in to serices that don’t implement the fancier protocols of YubiKey. While you can use OpenPGP to authenticate using SSH key-based auth this isn’t normally feasible in free (yeah, I’m cheap) SSH apps on iOS, and can be an enormous pain when using SSH inside WSL – Windows Subsystem for Linux – on Windows, since WSL/Linux can’t “see” the YubiKey directly. However by setting up a PAM – Pluggable Authentication Modules – module that understands OTPs and authenticates against the YubiKey API you can upgrade your Pi to accept an OTP in lieu of your regular user password. Since the YubiKey emulates a keyboard and types the OTP into the focussed dialog box, it will work out of the box in any SSH client on any system that you can plug the key into.
Pre-requisites
Before you get started you’ll need two snippets of information:
1. Your YubiKey ID
2. A Client ID from the YubiKey API
The simplest way to get your YubiKey ID is to fire up any application that will accept text input, and just long-press (or short press if you haven’t changed the OTP slot) your key so that it spews out a password. All but the last 32 characters of this password are your YubiKey ID.
“`
[ccccccxxxxxxxx] jsiuhwiygajsiuhqioksopskjuuwha
^ you want this bit!
“`
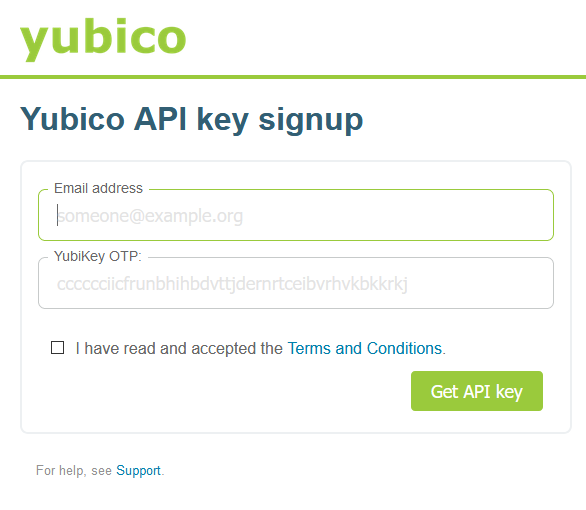
Your Client ID can be retrieved from the YubiKey API https://upgrade.yubico.com/getapikey/. Just enter an email address and long-press your YubiKey to produce a OTP. The PAM module does not require the secret key, you can save this if you want for a future application or ignore it- Yubico make it pretty easy to generate secret keys on this page.
Okay @Yubico API signup is
SO
GODDAMN
EASYStick your email in.
Touch your key to generate an OTP.
BOOM! You have a Client ID and Secret.
Rinse and repeat for each application. pic.twitter.com/6VWz1CmnIE— Phil Howard (@Gadgetoid) July 6, 2020
On your Pi
Now you’ve got the snippets of information you need, you can continue setup on your Pi.
I highly encourage the use of the latest Raspberry Pi OS so you don’t run into issues where my assumptions about what you’re using fall short. If you’re using something else I’m going to assume you know enough to adapt these commands to compensate!
First, install the Yubico PAM module. Contrary to other guides I’ve found this is as simple as running: `sudo apt-get install libpam-yubico`
Next you need to edit the `/etc/passwd` file and add `pi:YubiKey ID` to the bottom. For example your entry might look like this:
“`
pi:ccccccxxxxxxxx
“`
Now create a new file, `/var/yubico_passwd` and add the same thing again `pi:YubiKey ID`
Then edit `/etc/pam.d/sshd` and add `auth sufficient pam_yubico.so id=Client ID authfile=/var/yubico_passwd` (this is your Client ID from the API setup earlier)
Using “sufficient” ensures that you can log in using your YubiKey OTP, but that it’s not the *only* method of authentication supported. That way if something goes awry you can always log in with your normal password for “pi” and fix it. You can double-down on security later once you’re sure it works.
Now restart the SSH service: `sudo systemctl restart sshd`
Finally you can set up your SSH client application – in my case I was using Termius on iOS – to connect to your Pi. Instead of entering your password for “pi” just leave the field blank. When prompted for a password you can now press and hold the gold contacts on your YubiKey to enter a OTP that will log you right in.
Conclusion
I’ve found immediately that performing some actions on GitHub that used to require my password are now streamlined to a touch of my YubiKey. This includes things like changing scary repository settings (such as switching from private to public) which are part of my regular workflow and are now decidedly less irritating.
Actually setting up the YubiKey for authentication when connecting to an SSH server or pushing commits up to GitHub proved to be somewhat contrived, but this is more a Linux problem than a YubiKey problem and there’s a third party YubiKey Agent project that aims to streamline this process.
Getting YubiKey working with anything *inside* WSL is basically a no-go. It’s possible, but involves procedures so incredibly contrived that I stopped short of wasting my time entertaining them. WSL Update: I have codified the WSL pass-through setup into a bash script that you can run from within WSL in order to set up all of the required software, it’s based on the guide from https://codingnest.com/how-to-use-gpg-with-yubikey-wsl/#wslgpgbridge and you can find it here: https://github.com/gadgetoid/Yubi2WSL
With WSL2 coming soon, and trashing disk IO performance I’m likely to move my workflow into a traditional VM with which I’ll be able to share my USB devices anyway.
Overall the YubiKey has meaningfully powered-up my authentication game, giving me the means to sign commits or authenticate against SSH servers from any of my computers or SBC (I often push up from my development Pi’s, or other computers) without spreading keys across less-than-secure devices. While it’s a no-go on WSL, I can drop into a regular Windows terminal to at least sign my commits and releases.
On the closed-source nature of the YubiKey product itself- honestly, it doesn’t bother me. I use a lot of proprietary software and hardware, and my threat profile isn’t exactly Most-Wanted level. I appreciate the keen interest in, and desire for, a fully open-source alternative and will attempt to source one and give it a fair shake.
Really grokking the YubiKey, how it fits into my workflow and whether it sticks will take more than a week. Keep an eye out here, or on my Twitter @Gadgetoid to see how my experience with the YubiKey 5Ci pans out.